

As a supplier of 0802 LCD displays, I often receive inquiries from customers about how to connect these displays to a Bluetooth module. This process can seem daunting at first, but with the right guidance, it becomes a straightforward task. In this blog post, I'll walk you through the steps of connecting an 0802 LCD display to a Bluetooth module, from understanding the components to troubleshooting common issues.
Understanding the Components
Before we dive into the connection process, let's take a moment to understand the two main components: the 0802 LCD display and the Bluetooth module.
0802 LCD Display
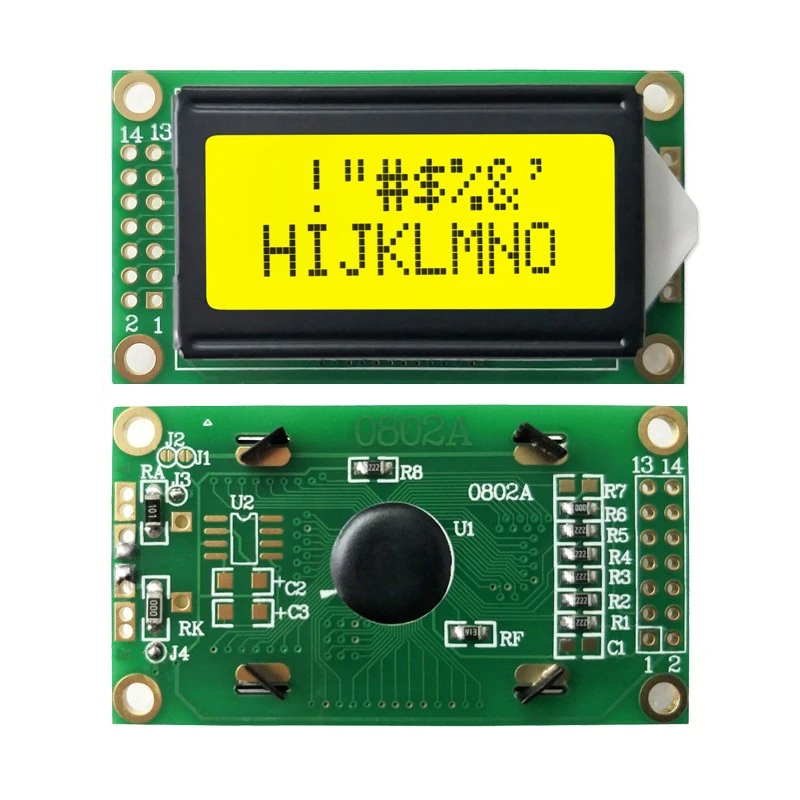
The 0802 LCD Display is a popular choice for many electronic projects. It features an 8-character by 2-line display, making it suitable for applications where space is limited. The display uses a standard parallel interface, which means it requires multiple data lines to communicate with a microcontroller or other devices.
Bluetooth Module
A Bluetooth module is a wireless communication device that allows your project to connect to other Bluetooth-enabled devices, such as smartphones, tablets, or laptops. There are many different types of Bluetooth modules available, but for this tutorial, we'll assume you're using a basic HC-05 or HC-06 module, which are commonly used in DIY electronics projects.
Required Tools and Materials
To connect the 0802 LCD display to the Bluetooth module, you'll need the following tools and materials:
- 0802 LCD Display
- Bluetooth module (e.g., HC-05 or HC-06)
- Microcontroller (e.g., Arduino Uno)
- Breadboard
- Jumper wires
- Power supply
Connection Steps
Now that you have all the necessary tools and materials, let's start connecting the 0802 LCD display to the Bluetooth module.
Step 1: Connect the 0802 LCD Display to the Microcontroller
First, you need to connect the 0802 LCD display to the microcontroller. The following is a typical pinout for the 0802 LCD display:
- VSS: Ground
- VDD: +5V
- VO: Contrast adjustment (connect to a potentiometer or a fixed voltage divider)
- RS: Register select
- RW: Read/write
- E: Enable
- D4 - D7: Data lines
Connect the pins of the 0802 LCD display to the corresponding pins on the microcontroller using jumper wires. For example, you can connect RS to pin 12, RW to pin 11, E to pin 10, and D4 - D7 to pins 5 - 8.
Step 2: Connect the Bluetooth Module to the Microcontroller
Next, you need to connect the Bluetooth module to the microcontroller. The HC-05 and HC-06 modules typically have the following pins:
- VCC: +5V
- GND: Ground
- TXD: Transmit data
- RXD: Receive data
Connect the VCC and GND pins of the Bluetooth module to the +5V and ground pins on the microcontroller, respectively. Then, connect the TXD pin of the Bluetooth module to the RXD pin of the microcontroller, and the RXD pin of the Bluetooth module to the TXD pin of the microcontroller.
Step 3: Power Up the Circuit
Once you've made all the connections, power up the circuit by connecting the power supply to the microcontroller. Make sure all the connections are secure and there are no short circuits.
Step 4: Program the Microcontroller
Now, you need to program the microcontroller to communicate with the 0802 LCD display and the Bluetooth module. You can use the Arduino IDE to write and upload the code to the microcontroller.

Here is a simple example code that demonstrates how to receive data from the Bluetooth module and display it on the 0802 LCD display:
#include <LiquidCrystal.h>

// initialize the library with the numbers of the interface pins
LiquidCrystal lcd(12, 11, 5, 6, 7, 8);

void setup() {
  // set up the LCD's number of columns and rows:
  lcd.begin(8, 2);
  // initialize serial communication at 9600 bits per second:
  Serial.begin(9600);
}

void loop() {
  // read the incoming byte:
  if (Serial.available()) {
    char incomingByte = Serial.read();
    // display the incoming byte on the LCD:
    lcd.print(incomingByte);
  }
}
Upload the code to the microcontroller using the Arduino IDE. Once the code is uploaded, open the serial monitor in the Arduino IDE and set the baud rate to 9600. You should see any data sent from the Bluetooth module displayed on the 0802 LCD display.
Troubleshooting Common Issues
If you encounter any issues during the connection process, here are some common problems and their solutions:
- No display on the LCD: Check the power supply and the connections between the LCD display and the microcontroller. Make sure the contrast adjustment is set correctly.
- No communication with the Bluetooth module: Check the connections between the Bluetooth module and the microcontroller. Make sure the baud rate of the Bluetooth module and the microcontroller are the same.
- Data not being displayed correctly: Check the code and make sure it is correctly configured to receive and display the data.
Conclusion
Connecting an 0802 LCD display to a Bluetooth module is a great way to add wireless communication capabilities to your electronic projects. By following the steps outlined in this blog post, you should be able to successfully connect the two components and start sending and receiving data wirelessly.
If you're interested in purchasing 0802 LCD displays or other LCD modules, such as the 20x2 LCD Display, please feel free to contact us for more information and to discuss your specific requirements. We're here to help you find the right solution for your project.
References
- Arduino Documentation: https://www.arduino.cc/reference/en/
- HC-05 and HC-06 Bluetooth Module Datasheets